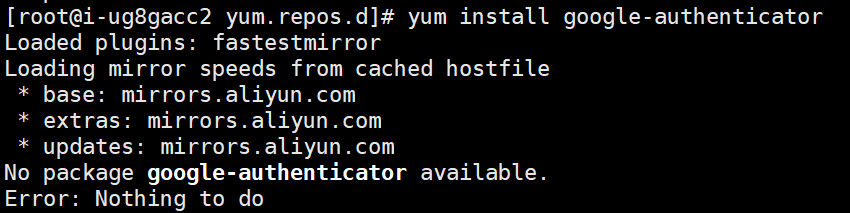
云主机启用双因素认证可以提高其安全性,可以通过谷歌认证器来实现,CentOS直接使用 yum install google-authenticator无法安装,需要手动下载安装包来安装,本文针对过程进行演示。
0 无法通过yum直接安装
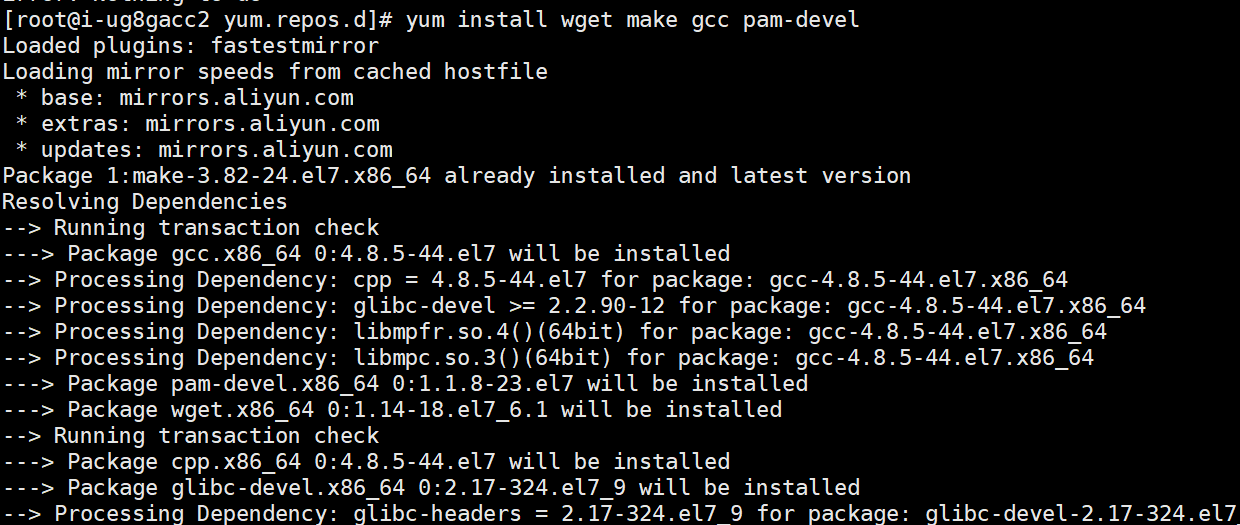
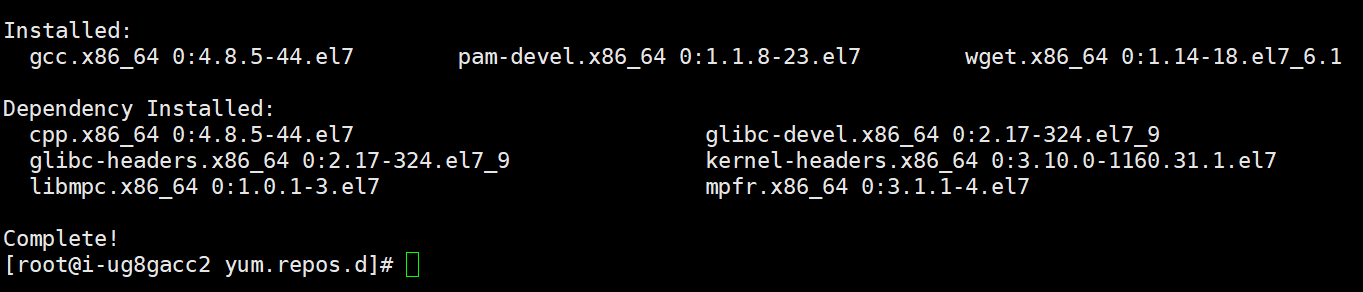
1 安装依赖
yum install wget make gcc pam-devel
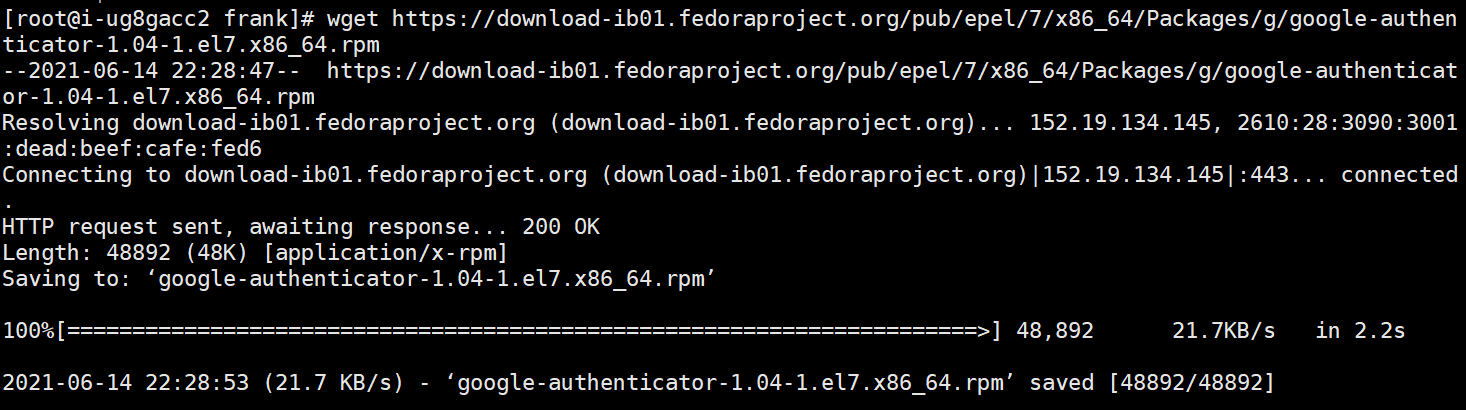
2 下载 Google 身份验证器的安装包
wget https://download-ib01.fedoraproject.org/pub/epel/7/x86_64/Packages/g/google-authenticator-1.04-1.el7.x86_64.rpm
3 安装谷歌认证器并配置
rpm -ivUh google-authenticator-1.04-1.el7.x86_64.rpm

查看是否已安装
yum list installed | grep google

添加 google_authenticator 认证模块
查找 google_authenticator 库位置:
find / -name 'pam_google_authenticator.so'

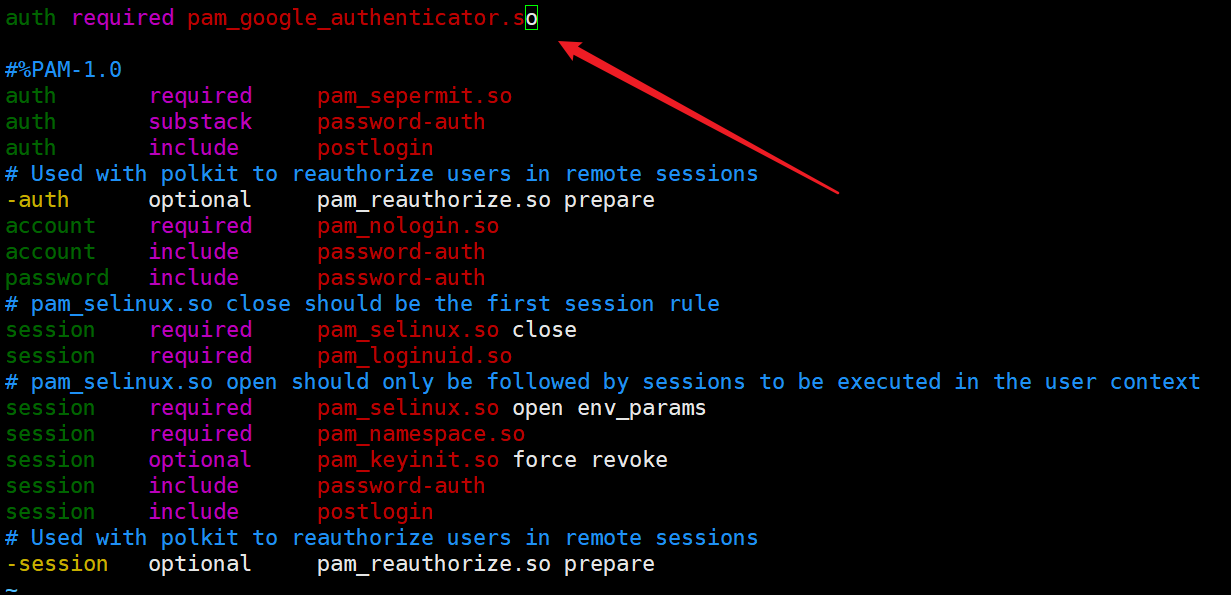
sshd添加Google Authenticator认证:
vim /etc/pam.d/sshd
在第一行添加:
auth required pam_google_authenticator.so
sshd 添加 pam 认证
vim /etc/ssh/sshd_config
修改:
ChallengeResponseAuthentication yes


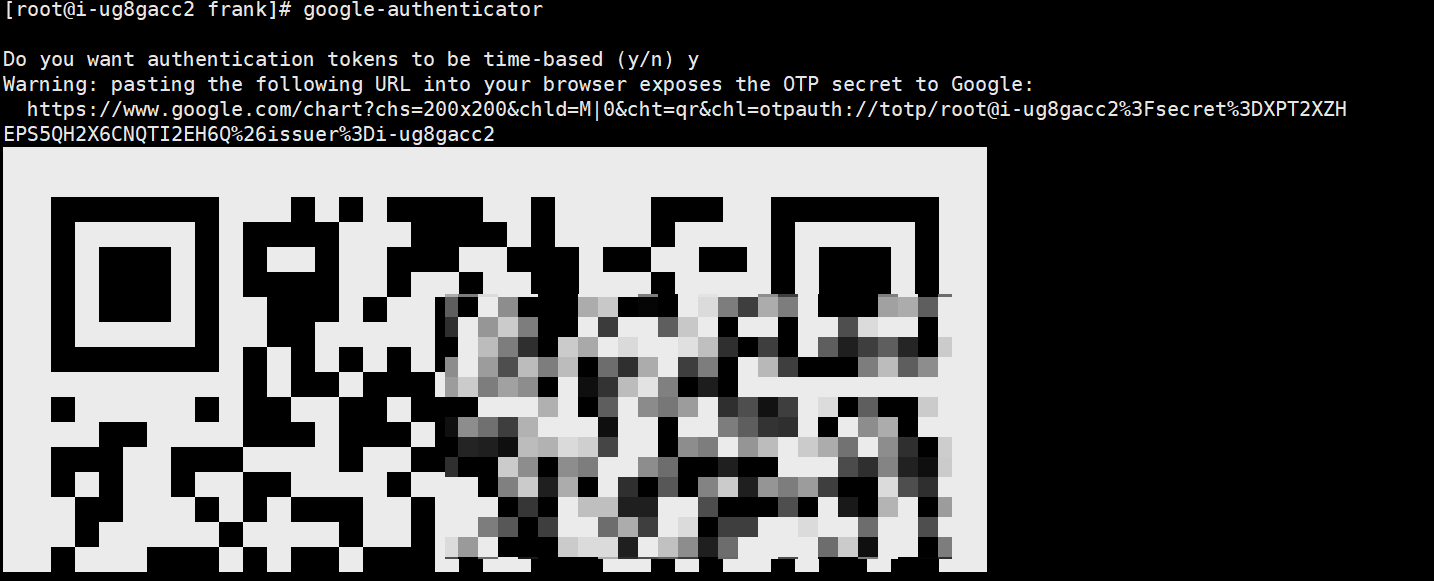
4 配置账号启用谷歌认证器
配置前手机端请先安装谷歌认证器或者同类软件。
切换到要配置的账号,执行命令google-authenticator
会显示二维码,打开手机端软件扫描其绑定即可,

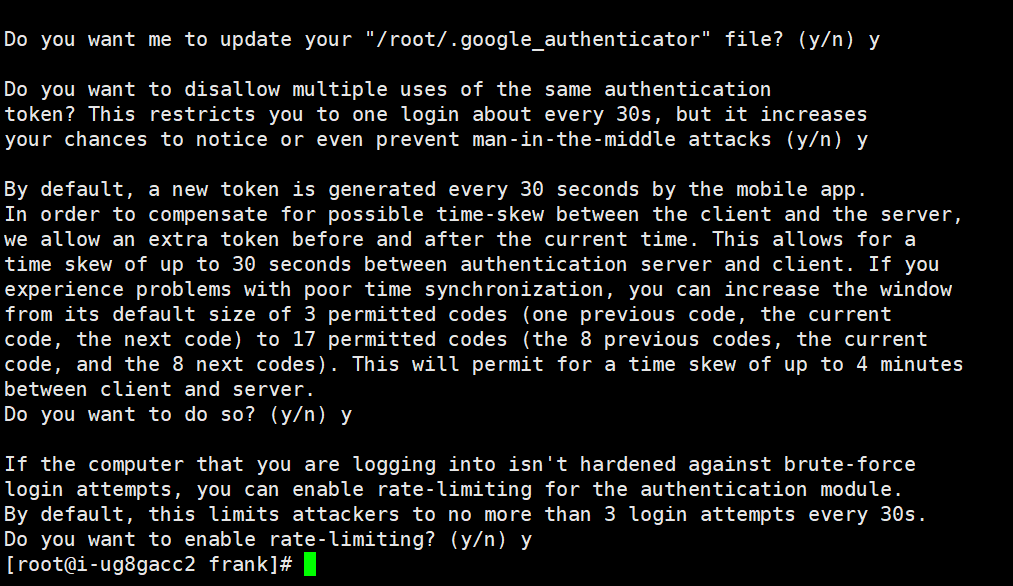
重启服务后生效
systemctl restart sshd.service
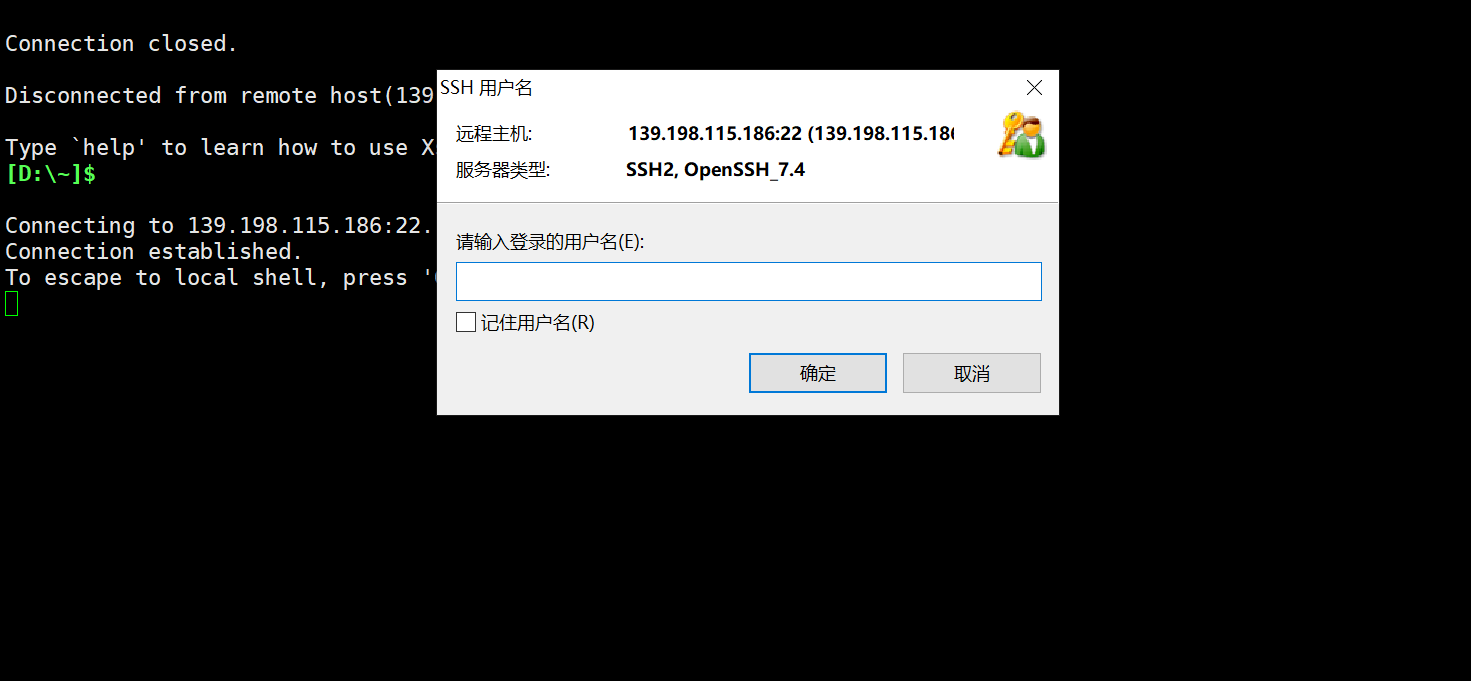
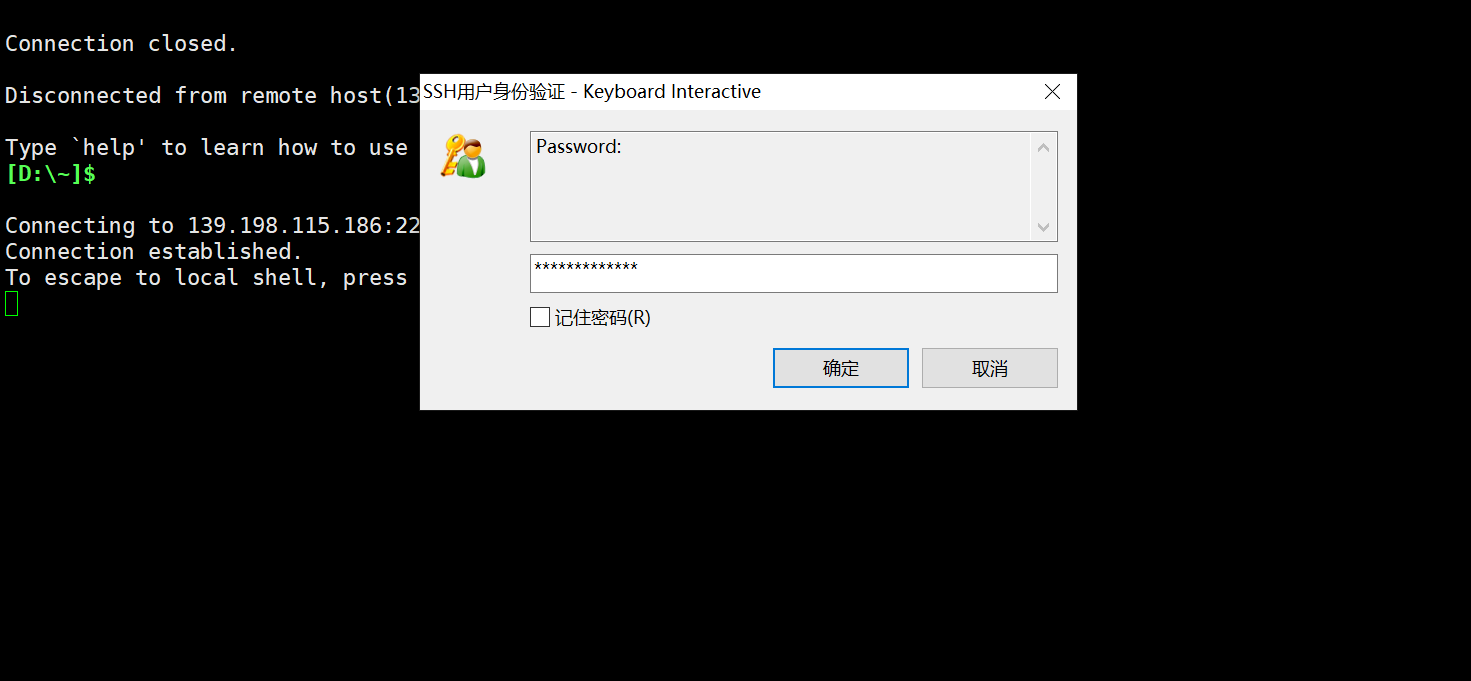
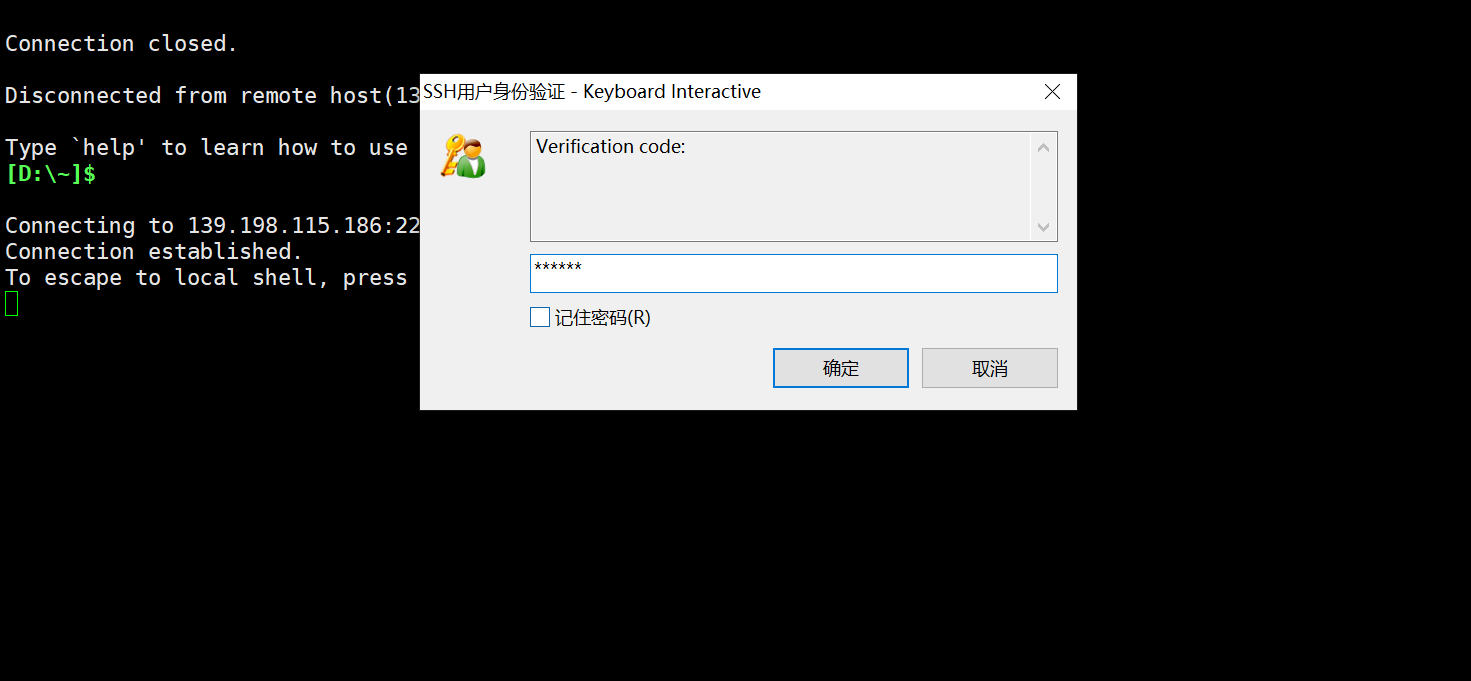
4 登录效果
使用Xshell登录效果如下
文章使用小书匠MarkDown编辑器书写,大家可以通过本站小书匠邀请码一文获取邀请码及下载链接。
